Setting Up Google Password Manager as Your Passkey Provider
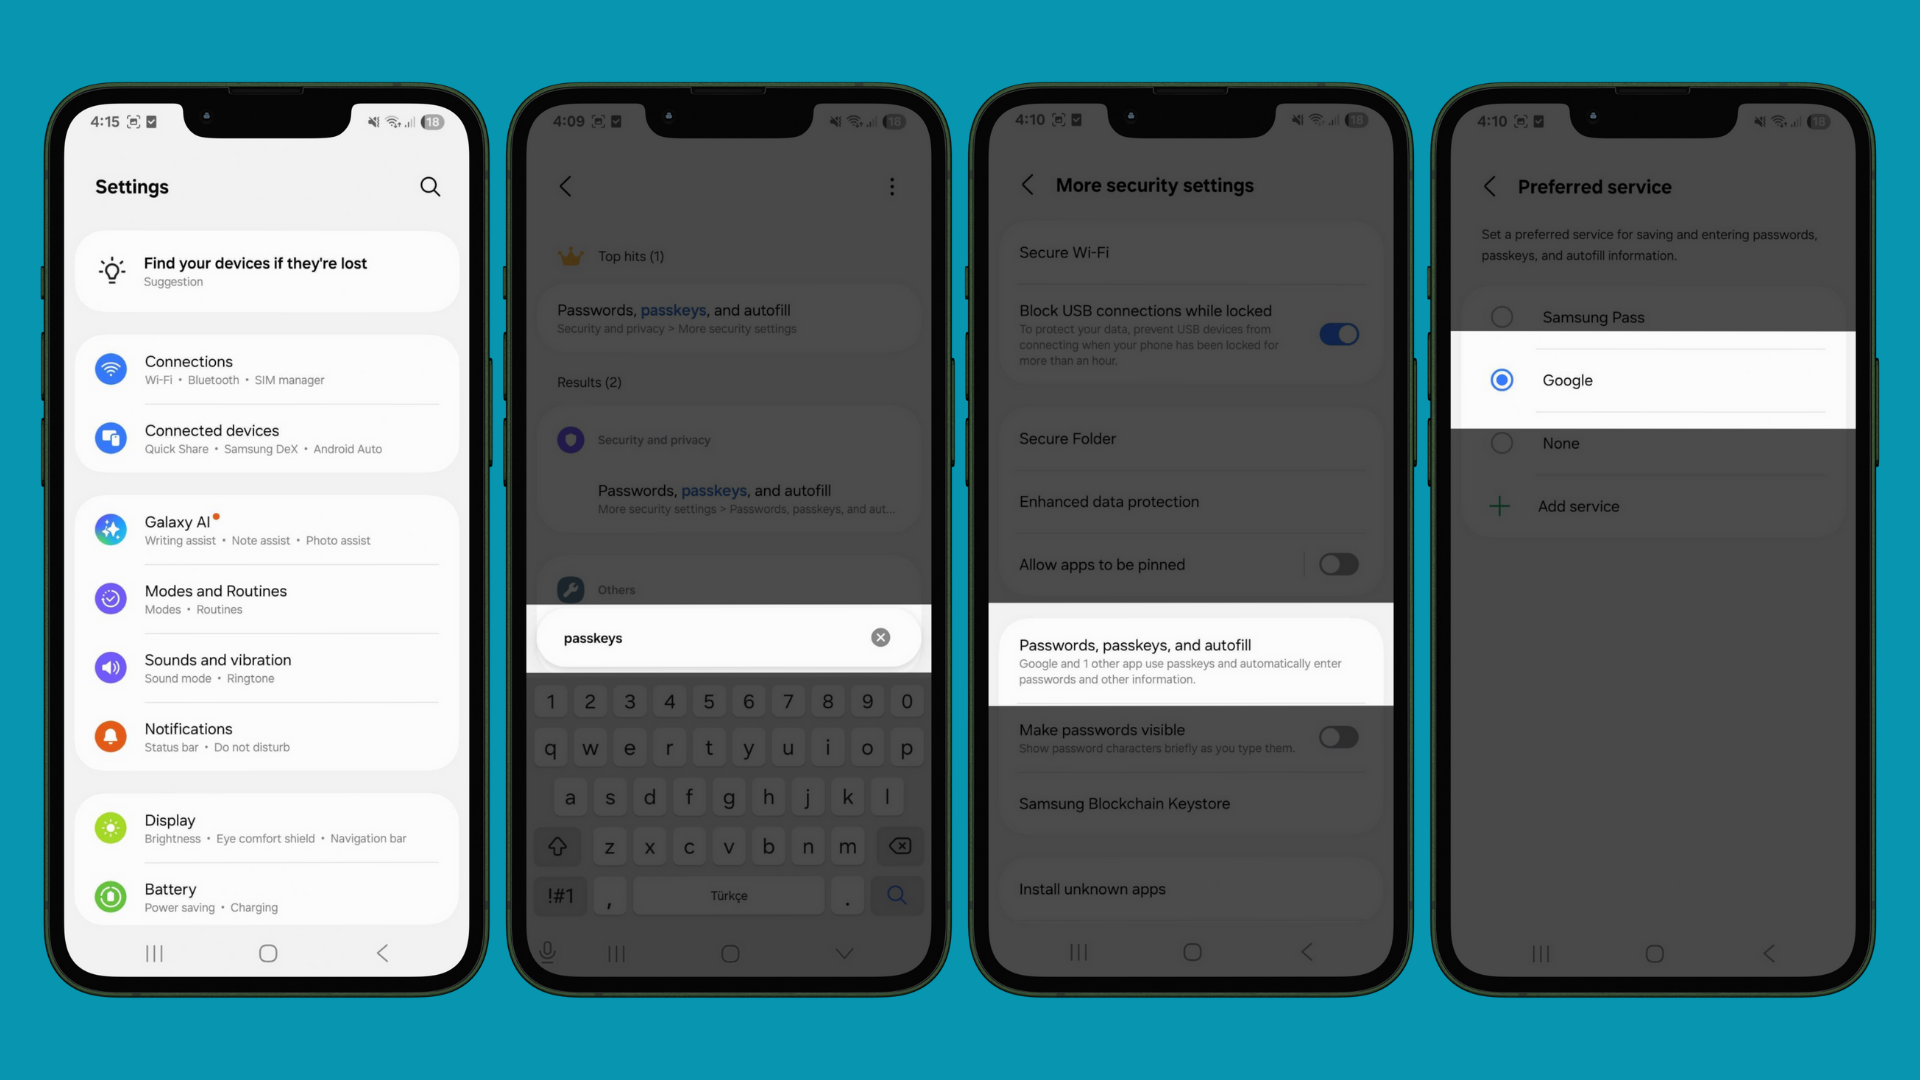
Follow these simple steps to configure Google Password Manager for use with Clave:- Go to Settings: Open the Settings app on your Android device
- Search for Passkeys: Use the search function at the top of Settings and type “passkeys”
- Tap “Passwords, passkeys, and autofill”: Select this option from the search results (the exact name may vary slightly depending on your device)
- Set Google as Preferred Service: In the “Preferred service” section, select Google as your passkey provider instead of other options
Using Google Password Manager with Clave
When creating your Clave account or logging in:- Account Creation: During the account creation process, when prompted to save your passkey, Google Password Manager will appear as an option
- Biometric Verification: Use your configured biometric method (fingerprint, face, or screen lock) to authenticate
- Passkey Storage: Your Clave passkey will be securely stored in Google Password Manager
- Future Access: For subsequent logins, Google Password Manager will automatically prompt you to use your stored passkey
Benefits of Using Google Password Manager with Clave
- Cross-Platform Sync: Passkeys sync across all your devices signed into the same Google account
- Enhanced Security: Hardware-backed security features on supported devices
- Biometric Authentication: Quick and secure access using your biometrics
- Seamless Integration: Works across Android devices and Chrome browser
Troubleshooting
If you encounter issues with Google Password Manager and Clave:- Ensure Google Services are Updated: Check for updates to Google Play Services and Chrome
- Verify Biometric Setup: Make sure your biometrics or screen lock are properly configured
- Check Passkey Settings: Ensure passkey support is enabled in Google Password Manager settings
- Clear Cache: If experiencing issues, try clearing Google Password Manager cache in device settings